Stateless OAuth2 Social Logins with Spring Boot
This article gives an overview of how to set up a Spring Boot OAuth2 client, allowing users to log in via their social accounts.

oauth2spring-bootauth0backendThe Spring Boot ecosystem with its various components and out-of-the-box production-ready modules is nothing short of amazing. In this article, we'll take a look at enabling social logins for your application by configuring Spring Boot as an OAuth2 client.
It's not too difficult to get started with a zero-config OAuth2 setup, but it turns out that there are a few quirks in the standard implementation:
- Spring Boot actually uses stateful HTTP sessions during the default authentication flow
- the default redirect flow can make it difficult to integrate from a mobile application or from a frontend hosted on a different domain
That's why this article will give an overview on how to make the authentication flow completely stateless and friendly towards any kind of client.
You can find the final source code on GitHub. If you'd like to follow along, please make sure to have Java 16 installed.
Table of Contents
- Picking Social Providers
- Standard Login Flow
- Improving the Login Flow
- Adding a Frontend
- Auth0 Considerations
Picking Social Providers
Choosing which social login providers to support will mostly depend on your target audience. For everyday folks, it will make sense to support providers like:
- Apple
Whereas for a more technical audience, it might make sense to support providers like:
- GitHub
- GitLab
Now, it's totally possible to register a new OAuth2 application via the developer portal of any of these providers. But for this project, I've decided to use an intermediary identity/authentication service called Auth0.
They've got some nice features where:
- they'll maintain a repository of all of your application's users
- they can offer different methods of authentication for your users (e.g.: social logins, traditional passwords)
- it's easy to start prototyping, because you can just toggle which social providers you'd like to enable
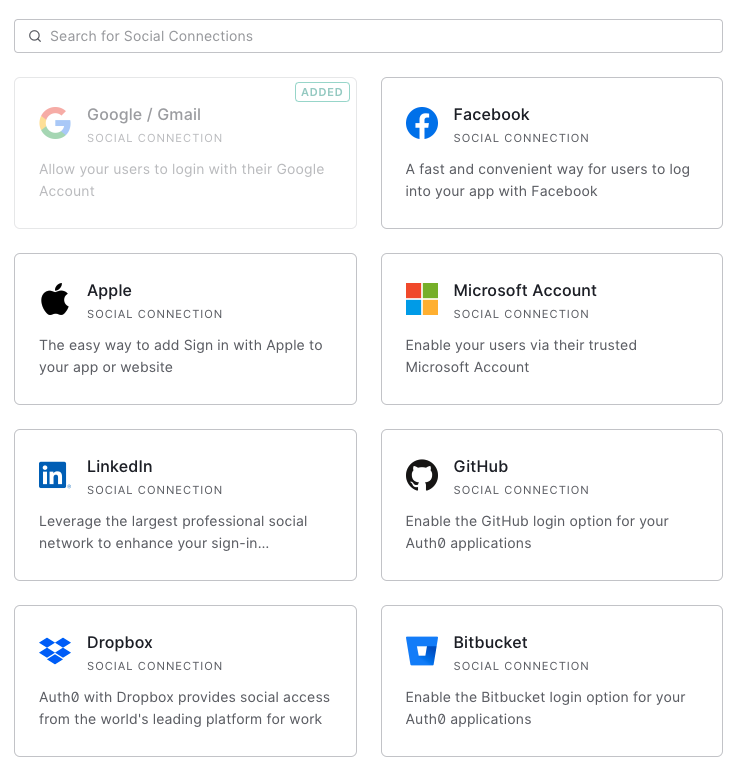
If you don't want to use Auth0, that's completely fine—you can just integrate directly with the social provider(s) of your choice. This article will touch on a few Auth0-specific things, but you should still be able to follow along without issue.
Standard Login Flow
Below's a diagram of what the standard OAuth2 login flow looks like with Spring Boot.

- The user clicks "Log in with Twitter" on your website and navigates to the backend authorization URL
/oauth2/authorization/twitter - The backend crafts the external authorization URL
api.twitter.com/oauth/authorize?...and redirects the user there via HTTP status code 302 - The user arrives on the social provider's website, where they can authorize or deny the login request
- The user is sent back from Twitter to the backend callback URL
/login/oauth2/code/twitter, at which point the backend picks out the authorization code URL query parameter set by Twitter, and sends it back to Twitter (along with an API key) in the background - Twitter validates the authorization code and returns the social account details, like name, email, picture, etc.
- The backend finalizes the Twitter login (e.g. by registering the new user, sending a welcome e-mail, etc.)
- The user receives a cookie and is now logged in to your application
To get started with this standard flow, add the following dependencies to pom.xml:
<dependency>
    <groupId>org.springframework.boot</groupId>
    <artifactId>spring-boot-starter-web</artifactId>
</dependency>
<dependency>
    <groupId>org.springframework.boot</groupId>
    <artifactId>spring-boot-starter-security</artifactId>
</dependency>
<dependency>
    <groupId>org.springframework.security</groupId>
    <artifactId>spring-security-oauth2-client</artifactId>
</dependency>
<dependency>
    <!--For retrieving social account details through OpenID Connect (OIDC)-->
    <groupId>org.springframework.security</groupId>
    <artifactId>spring-security-oauth2-jose</artifactId>
</dependency>
<dependency>
    <!--Lombok is optional, but makes Java better :)-->
    <groupId>org.projectlombok</groupId>
    <artifactId>lombok</artifactId>
    <optional>true</optional>
</dependency>
And add the following config to application.yaml:
spring:
  security:
    oauth2:
      client:
        registration:
          auth0:
            client-id: '${AUTH0_CLIENT_ID:}'
            client-secret: '${AUTH0_CLIENT_SECRET:}'
            authorization-grant-type: 'authorization_code'
            redirect-uri: 'http://localhost:8080/login/oauth2/code/auth0'
            scope: ['openid', 'profile', 'email']
        provider:
          auth0:
            issuer-uri: '${AUTH0_ISSUER_URI:}'
#
# If you're integrating directly with, say, Google, you need even less config
# (this is because GOOGLE is part of Spring's CommonOAuth2Provider enum class)
#
# spring:
#   security:
#     oauth2:
#       client:
#         registration:
#           google:
#             client-id: '${GOOGLE_CLIENT_ID:}'
#             client-secret: '${GOOGLE_CLIENT_SECRET:}'
#             redirect-uri: 'http://localhost:8080/login/oauth2/code/google'
#
Now, this is really all that's needed for a fully functional OAuth2 client.
To verify whether everything works as expected,
I do recommend adding a simple /info endpoint like the one below.
@RestController
@RequestMapping("info")
public class InfoController {

    @GetMapping("")
    public Info getInfo(OAuth2AuthenticationToken authentication) {
        return new Info()
                .setApplication("tutorial-social-logins")
                .setPrincipal(authentication.getPrincipal().getAttributes());
    }

    @Data
    @Accessors(chain = true)
    private static class Info {
        private String application;
        private Map<String, Object> principal;
    }

}
Which should return a JSON object like the one below for authenticated users.
{
  "application": "tutorial-social-logins",
  "principal": {
    "sub": "twitter|12345",
    "name": "Jessy",
    "picture": "https://pbs.twimg.com/12345_normal.jpg",
    ...
  }
}
Finally, in order to actually test this authentication flow, do one of the following:
- navigate to /oauth2/authorization/auth0,
which will automatically redirect you to the external provider's website
(note: the last part of the authorization URL above,
auth0in this example, refers to the registered client's name insideapplication.yaml) - navigate to /login,
which will show a nice HTML page with all social providers
from
application.yaml - navigate to our custom /info endpoint
— by default, Spring requires authentication on every endpoint, so, automatically, it will either:
- redirect you to the
/oauth2/authorization/auth0endpoint - redirect you to the
/loginpage, if you've got more than one social provider defined insideapplication.yaml
- redirect you to the
Improving the Login Flow
The standard authentication flow above is nice because it doesn't require any additional configuration, and works well enough for most applications, probably.
There are three things which I don't like about it, though:
- it's stateful during authentication
- after authenication, it provides the user with a stateful session cookie
- it very much depends on HTTP 302 redirects, which might not be ideal if you're looking to support mobile apps or frontends hosted on different domains
Here, stateful means that the authentication flow or session is tied to a particular application instance (Java process), and thus wouldn't work in a load-balanced setup.
The next few sections of this article will therefore demonstrate how to make the flow completely stateless and free from HTTP 302 redirects.
And because we're going to need a custom security configuration file, let's get started with the following template which already has a few basic settings.
@Component
@AllArgsConstructor
public class SecurityConfig extends WebSecurityConfigurerAdapter {

    @Override
    @SneakyThrows
    protected void configure(HttpSecurity httpSecurity) {
        httpSecurity
                // Endpoint protection
                .authorizeHttpRequests(config -> {
                    config.anyRequest().permitAll();
                })
                // Disable "JSESSIONID" cookies
                .sessionManagement(config -> {
                    config.sessionCreationPolicy(SessionCreationPolicy.STATELESS);
                });
                // OAuth2 (social logins)
                .oauth2Login(config -> {
                    //
                    //
                    // This is the important part of the security config,
                    // where we will soon configure the new login flow
                    //
                    //
                })
    }

}
Stateless Authentication (One-Time)
The default OAuth2 flow makes heavy use of Spring sessions.
When a user navigates to the backend authorization URL /oauth2/authorization/auth0,
a JSESSIONID cookie is returned in the HTTP (302) response.
The user then goes on to approve or deny the authentication request on the external provider's website.
And then, after being redirected back to the backend callback URL /login/oauth2/code/auth0,
the browser automatically sends along the JSESSIONID cookie from earlier.
This is because the backend now needs to look up some query parameters
which it originally sent along during the redirect to the external provider,
like the ?state=... query parameter (for preventing CSRF).

This is not stateless, though.
If multiple instances of this application are running simultaneously behind a load balancer,
Spring will fail to look up the session (state parameter)
if the callback request is handled by an instance other than the one which handled the authorization request and issued the JSESSIONID cookie.
To make it stateless, we'll instead serialize the original request object to a string, and put the ENTIRE thing in a cookie.

This can be done by providing a custom implementation of AuthorizationRequestRepository<OAuth2AuthorizationRequest>, like so:
@Component
public class CustomStatelessAuthorizationRequestRepository implements AuthorizationRequestRepository<OAuth2AuthorizationRequest> {

    @Override
    public OAuth2AuthorizationRequest loadAuthorizationRequest(HttpServletRequest request) {
        return this.retrieveCookie(request);
    }

    @Override
    public void saveAuthorizationRequest(OAuth2AuthorizationRequest authorizationRequest, HttpServletRequest request, HttpServletResponse response) {
        if (authorizationRequest == null) {
            this.removeCookie(response);
            return;
        }
        this.attachCookie(response, authorizationRequest);
    }

    @Override
    @Deprecated
    public OAuth2AuthorizationRequest removeAuthorizationRequest(HttpServletRequest request) {
        return this.retrieveCookie(request);
    }

    //
    // There are also some private helper methods in this class for:
    //   - attaching the cookie to the outgoing response
    //   - retrieving the cookie from an incoming request
    //
    // Plus a bit of functionality to encrypt the cookie payload,
    // ensuring that the cookie doesn't get tampered with
    //

}
(Make sure to have a look at this class' full source code for more details.)
In a nutshell, the above implementation uses a few helper methods to serialize the entire OAuth2AuthorizationRequest object into a string,
and attach it as a cookie.
This eliminates the need to store the OAuth2AuthorizationRequest objects in-memory,
as would be the case with Spring's default HttpSessionOAuth2AuthorizationRequestRepository
implementation of the interface.
All that's left to do, then, is to inject and register this custom implementation in the security configuration class like so:
@Component
@AllArgsConstructor
public class SecurityConfig extends WebSecurityConfigurerAdapter {

    private final CustomStatelessAuthorizationRequestRepository customStatelessAuthorizationRequestRepository;

    @Override
    @SneakyThrows
    protected void configure(HttpSecurity httpSecurity) {
        httpSecurity
                // OAuth2 (social logins)
                .oauth2Login(config -> {
                    config.authorizationEndpoint(subconfig -> {
                        subconfig.authorizationRequestRepository(this.customStatelessAuthorizationRequestRepository);
                    });
                })
                // ...other config...
    }

}
Now, when a user visits the /oauth2/authorization/auth0 authorization URL,
the backend responds with a custom cookie containing the entire (serialized) OAuth2AuthorizationRequest object,
instead of a JSESSIONID cookie containing a pointer to some HashMap entry.
Stateless Sessions (Recurring)
After the one-time Google, Twitter or GitHub authentication has taken place, it's time to register the new user and establish a long-term session for them.
To register the user, we need a custom OAuth2AuthorizedClientService like the one below.
@Component
@AllArgsConstructor
public class CustomAuthorizedClientService implements OAuth2AuthorizedClientService {

    private final AccountService accountService;

    @Override
    public void saveAuthorizedClient(OAuth2AuthorizedClient client, Authentication authentication) {
        // You can grab the access + refresh tokens as well via the "client"
        this.accountService.findOrRegisterAccount(
                authentication.getName(),
                authentication.getName().split("\\|")[0], // something Auth0 specific
                ((DefaultOidcUser) authentication.getPrincipal()).getClaims()
        );
    }

    // The other required interface methods aren't important
    // and can be left to their default implementations returning null or void

}
Here, AccountService would be a simple class responsible for actually saving the new user to the database, sending them a welcome e-mail, etc.
Now, in order to actually use this custom OAuth2AuthorizedClientService instance,
we inject it into the Spring security configuration file and register it like so:
@Component
@AllArgsConstructor
public class SecurityConfig extends WebSecurityConfigurerAdapter {

    private final CustomAuthorizedClientService customAuthorizedClientService;
    // ...other dependencies...

    @Override
    @SneakyThrows
    protected void configure(HttpSecurity httpSecurity) {
        httpSecurity
                // OAuth2 (social logins)
                .oauth2Login(config -> {
                    config.authorizedClientService(this.customAuthorizedClientService);
                    // ...other oauth2 config...
                })
                // ...other config...
    }

}
This takes care of registering and persisting new users to the database. The next step, is establishing a long-term session for them, so they remain logged in.
By default, Spring employs an in-memory session store for this, which has two drawbacks:
- it's stateful, meaning that users' session cookies are only valid for the particular application instance (Java process) which issued them
- it's ephemeral, meaning that all user sessions are destroyed upon application restarts, requiring them to re-authenticate after every deploy
For these reasons, we'll instead opt for an external and persistent session store like Redis. In concrete terms, this means we need to:
- set up a Redis instance
- provide the new user with a (custom) session cookie in the HTTP response, containing some identifier via which they can be looked up in Redis on subsequent HTTP requests
To keep things simple, we won't set up and integrate with an actual Redis instance, but simply send the new user a session cookie containing their generated account UUID.
For this, we need to specify an OAuth2 success (and failure) handler in the security configuration.
@Component
@AllArgsConstructor
public class SecurityConfig extends WebSecurityConfigurerAdapter {

    // ...dependencies...

    @Override
    @SneakyThrows
    protected void configure(HttpSecurity httpSecurity) {
        httpSecurity
                // OAuth2 (social logins)
                .oauth2Login(config -> {
                    // Success lambda
                    config.successHandler(((HttpServletRequest request, HttpServletResponse response, Authentication authentication) -> {
                        response.addCookie(new Cookie("SESSION", "<GET_ACCOUNT_UUID_SOMEHOW>"));
                        response.getWriter().write("Thanks for logging in");
                    }));
                    // Failure lambda
                    config.failureHandler(((HttpServletRequest request, HttpServletResponse response, AuthenticationException exception) -> {
                        response.getWriter().write("Login failed");
                    }));
                    // ...other oauth2 config...
                })
                // ...other config...
    }

}
However, rather than inlining these lambda's directly in the security configuration,
I prefer outsourcing this response handling to a custom class called OAuthController.
@Component
@AllArgsConstructor
public class SecurityConfig extends WebSecurityConfigurerAdapter {

    private final OAuthController oauthController;
    // ...other dependencies...

    @Override
    @SneakyThrows
    protected void configure(HttpSecurity httpSecurity) {
        httpSecurity
                // OAuth2 (social logins)
                .oauth2Login(config -> {
                    config.successHandler(this.oauthController::oauthSuccessResponse);
                    config.failureHandler(this.oauthController::oauthFailureResponse);
                    // ...other oauth2 config...

                })
                // ...other config...
    }

}
Here the OAuthController isn't necessarily a controller in its traditional understanding
(with annotations like @GetMapping, @PostMapping, etc.),
but rather a component used for dealing with the HTTP servlet request and response objects:
@Controller
public class OAuthController {

    @SneakyThrows
    public void oauthSuccessResponse(HttpServletRequest request, HttpServletResponse response, Authentication authentication) {
        response.addCookie(new Cookie("SESSION", "<GET_ACCOUNT_UUID_SOMEHOW>"));
        response.getWriter().write("Thanks for logging in");
    }

    @SneakyThrows
    public void oauthFailureResponse(HttpServletRequest request, HttpServletResponse response, AuthenticationException exception) {
        response.getWriter().write("Login failed");
    }

}
Now, to push this controller idea even further,
I would consider the callback logic inside CustomAuthorizedClientService
from the start of this section to also be better suited for this OAuthController.
So let's add an oauthSuccessCallback method to our new controller class.
@Controller
@AllArgsConstructor
public class OAuthController {

    private final AccountService accountService;

    @SneakyThrows
    public void oauthSuccessCallback(OAuth2AuthorizedClient client, Authentication authentication) {
        // You can grab the access + refresh tokens as well via the "client"
        UUID accountId = this.accountService.findOrRegisterAccount(
                authentication.getName(),
                authentication.getName().split("\\|")[0],
                ((DefaultOidcUser) authentication.getPrincipal()).getClaims()
        );
    }

    @SneakyThrows
    public void oauthSuccessResponse(HttpServletRequest request, HttpServletResponse response, Authentication authentication) {
        response.addCookie(new Cookie("SESSION", "<GET_ACCOUNT_UUID_SOMEHOW>"));
        response.getWriter().write("Thanks for logging in");
    }

    @SneakyThrows
    public void oauthFailureResponse(HttpServletRequest request, HttpServletResponse response, AuthenticationException exception) {
        response.getWriter().write("Login failed");
    }

}
We then inject this OAuthController into the CustomAuthorizedClientService,
which would look like this.
Now, there's just one puzzle left to solve: how to get the accountId value from the callback method to the response method inside the OAuthController?
Answer: via their common Authentication method parameter, as shown below.
@Controller
@AllArgsConstructor
public class OAuthController {

    private final AccountService accountService;

    @SneakyThrows
    public void oauthSuccessCallback(OAuth2AuthorizedClient client, Authentication authentication) {
        // You can grab the access + refresh tokens as well via the "client"
        UUID accountId = this.accountService.findOrRegisterAccount(
                authentication.getName(),
                authentication.getName().split("\\|")[0],
                ((DefaultOidcUser) authentication.getPrincipal()).getClaims()
        );
        AuthenticationHelper.attachAccountId(authentication, accountId.toString());
    }

    @SneakyThrows
    public void oauthSuccessResponse(HttpServletRequest request, HttpServletResponse response, Authentication authentication) {
        String accountId = AuthenticationHelper.retrieveAccountId(authentication);
        response.addHeader(HttpHeaders.SET_COOKIE, CookieHelper.generateCookie("SESSION", accountId, Duration.ofDays(1)));
        response.setContentType(MediaType.APPLICATION_JSON_VALUE);
        response.getWriter().write("{ \"status\": \"success\" }");
    }

    @SneakyThrows
    public void oauthFailureResponse(HttpServletRequest request, HttpServletResponse response, AuthenticationException exception) {
        response.setStatus(HttpServletResponse.SC_UNAUTHORIZED);
        response.setContentType(MediaType.APPLICATION_JSON_VALUE);
        response.getWriter().write("{ \"status\": \"failure\" }");
    }


}
(Feel free to have a look at the AuthenticationHelper and CookieHelper utility classes' source code if you want to learn more about the details.)
And this actually concludes the setup for supporting stateless recurring sessions.
Even though there's no actual database persistence in the AccountService,
and no actual Redis integration in the OAuthController,
both of these components are set up with all the information they need to externally persist their data or cookie identifiers.
Injecting a JdbcTemplate or RedisTemplate and finishing up should be relatively straightforward.
Improved Redirect Flow
Even though we've made significant changes to the default OAuth2 implementation, the actual (redirect) flow described earlier hasn't changed at all.
- The user still needs to visit the backend authorization URL at
/oauth2/authorization/auth0via their browser - The backend is still responsible for redirecting the user to the social provider's website by responding with an HTTP 302 (redirect) response
- After clicking APPROVE or DENY on the social provider's website,
the user needs to be sent back to the backend callback URL at
/oauth2/login/code/auth0to finish the authentication
(Note: it's during this last callback request when the OAuthController attaches
a custom session cookie with the account UUID)
This works great, but the entire authentication flow is very much orchestrated by the backend. A more frontend-orchestrated flow would look like this:

- The user clicks "Log in with Twitter" on your website, making an HTTP request
to the backend authorization URL
/oauth2/authorization/twitter - The backend crafts the external authorization URL and sends it back as JSON
{ "authorizationUrl": "api.twiter.com/oauth/authorize?..." }rather than an HTTP 302 redirect - The frontend reads the JSON response and uses JavaScript to redirect the user to the exernal authorization URL
- The user arrives on Twitter's website, where they can approve or deny the login request
- The user is redirected back to the frontend, which reads and forwards all URL query
parameters (including the authorization code) to the backend
callback URL
/oauth2/login/code/twitter - The backend sends this authorization code back to Twitter (together with an API key)
- Twitter validates the code and returns the social account details, like name, email, picture, etc.
- The backend finalizes the Twitter login (for example, by registering the new user, sending a welcome e-mail, etc.)
- The frontend receives a cookie or bearer token in the HTTP response and the user is now logged in
The main reason for making this flow not rely on HTTP 302 redirects, is to make it better suited for XHR (AJAX) requests from different domains as well as non-browser clients like mobile apps.
The class responsible for returning with an HTTP 302 redirect is
OAuth2AuthorizationRequestRedirectFilter, or, more specifcally,
its private final RedirectStrategy authorizationRedirectStrategy field,
which is tasked with actually writing the HTTP response.
And unfortunately, at the time of this writing, it's not possible to override or customize this authorizationRedirectStrategy strategy field,
so we must use a trick.
- extend the default
OAuth2AuthorizationRequestRedirectFilter - use a reflection hack to overwrite its
RedirectionStrategyfield with a custom instance - insert the new filter just before the original filter in the chain
So, let's get started by creating the custom RedirectionStrategy instance,
which might look something like this:
RedirectStrategy customStrategy = (HttpServletRequest request, HttpServletResponse response, String url) -> {
    response.setStatus(HttpServletResponse.SC_OK);
    response.setContentType(MediaType.APPLICATION_JSON_VALUE);
    response.getWriter().write("{ \"redirectUrl\": \"%s\" }".formatted(url));
};
Now, because this is another piece of OAuth related code which deals with writing HTTP responses,
I actually prefer making it a part of the OAuthController we've defined earlier.
@Controller
@AllArgsConstructor
public class OAuthController {

    private final AccountService accountService;

    @SneakyThrows
    public void oauthRedirectResponse(HttpServletRequest request, HttpServletResponse response, String url) {
        response.setStatus(HttpServletResponse.SC_OK);
        response.setContentType(MediaType.APPLICATION_JSON_VALUE);
        response.getWriter().write("{ \"redirectUrl\": \"%s\" }".formatted(url));
    }

    @SneakyThrows
    public void oauthSuccessCallback(...) { ... }

    @SneakyThrows
    public void oauthSuccessResponse(...) { ... }

    @SneakyThrows
    public void oauthFailureResponse(...) { ... }


}
We can then apply the aforementioned trick by extending the default filter
and overwriting its authorizationRedirectStrategy like this:
@Component
public class CustomAuthorizationRedirectFilter extends OAuth2AuthorizationRequestRedirectFilter {

    @SneakyThrows
    public CustomAuthorizationRedirectFilter(
            OAuthController oAuthController,
            OAuth2AuthorizationRequestResolver authorizationRequestResolver,
            AuthorizationRequestRepository<OAuth2AuthorizationRequest> authorizationRequestRepository
    ) {
        super(authorizationRequestResolver);
        super.setAuthorizationRequestRepository(authorizationRequestRepository);
        // Reflection hack to overwrite the parent's redirect strategy
        RedirectStrategy customStrategy = oAuthController::oauthRedirectResponse;
        Field field = OAuth2AuthorizationRequestRedirectFilter.class.getDeclaredField("authorizationRedirectStrategy");
        field.setAccessible(true);
        field.set(this, customStrategy);
    }

}
The final step would be to inject this custom filter into the security configuration, and inserting it just before the original one in the chain.
@Component
@AllArgsConstructor
public class SecurityConfig extends WebSecurityConfigurerAdapter {

    private final CustomAuthorizationRedirectFilter customAuthorizationRedirectFilter;
    // ...other dependencies...

    @Override
    @SneakyThrows
    protected void configure(HttpSecurity httpSecurity) {
        httpSecurity
                // Filters
                .addFilterBefore(this.customAuthorizationRedirectFilter, OAuth2AuthorizationRequestRedirectFilter.class)
                // ...other config...
    }

}
And that's all.
HTTP requests to /oauth2/authorization/auth0 will no longer be responded to with an HTTP 302 redirect,
but with an HTTP 200 JSON body like the one below.
{
  "redirectUrl": "https://tenant.auth0.com/authorize?..."
}
Adding a Frontend
Let's finish by adding a small frontend to this application. Add the following HTML pages to Spring Boot's static resources folder:
- index.html for showing some links to log in with Google or Twitter (via Auth0 in this example)
- profile.html for showing whether the user is currently logged in (implemented by using an endpoint to check if there's a session cookie present)
- callback.html to have a page where the user ends up after being redirected back from the social provider's website
Whenever the user clicks the "Log in with Twitter" button, the frontend should make an HTTP request to retrieve the Twitter authorization URL from our backend, and redirect the user there.
<script>
  const { redirectUrl } = await (await fetch('http://localhost:8080/oauth2/authorization/auth0?connection=twitter')).json();
  location.replace(redirectUrl);
</script>
After approving or denying the login attempt on Twitter's website,
the user should be redirected to the /callback.html page,
which can be configured by specifying a different redirect URI inside
application.yaml like this.
The last step would be for the frontend to forward all query parameters it receives on the /callback.html page
to the callback URL /oauth2/login/code/auth0 on the backend, like this:
<script>
  const response = await fetch(`http://localhost:8080/oauth2/login/code/auth0${location.search}`);
  // This response would include a session cookie or authorization header, so the user is logged in
</script>
After this, the authentication is finalized, and the user will be logged in.
Auth0 Considerations
Here are a few considerations if you're using the intermediary Auth0 provider, rather than an actual social login provider like Google or Twitter.
By default,
Spring only exposes a single /oauth2/authorization/auth0 endpoint for retrieving the external authorization URL to Auth0's server.
By navigating there, users will land on an Auth0 hosted webpage where they can click Google or Twitter, only to be redirected again to the actual social provider's website.
If, like me, you aren't interested in the intermediary screen,
Auth0 also allows developers to pass a URL request parameter called connection.
This means that, if we redirect our users to the Auth0 authorization URL with the ?connection=twitter as a query parameter,
Auth0 won't show the intermediary screen, making them end up on Twitter directly.
To make this work, we need to add an extra OAuth2 configuration component extending the OAuth2AuthorizationRequestResolver interface.
Here's an example of what such a CustomAuthorizationRequestResolver might look like.
And just like the other custom OAuth2 components from this article,
this CustomAuthorizationRequestResolver should be injected into the Spring security configuration.
It can then be registered
like this.